
- By Swallace
- No Comments
Our new Update V5 is here
Our new Update V5 is here!
As in previous years, we have now spent several months preparing a new version of our Upload Automation tool. It is the fifth version of the tool, which again brings us a bit closer to how we envision the future for the tool. You can’t immediately see a lot of differences from the previous version, but a lot has changed.
More about this in the following:
User Interface Changes
Platform Navbar
Especially users with smaller screens should be happy about this change. The platform navbar can now be folded in and out. Thus, the view of the essentials is no longer lost due to the width of the platform navbar.
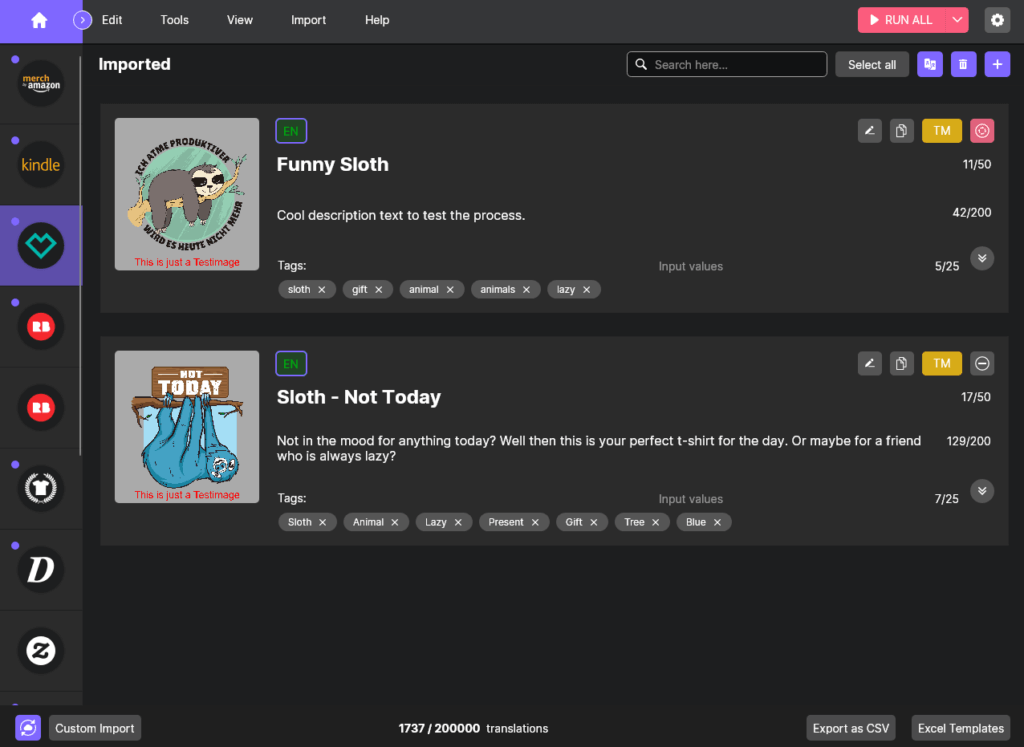
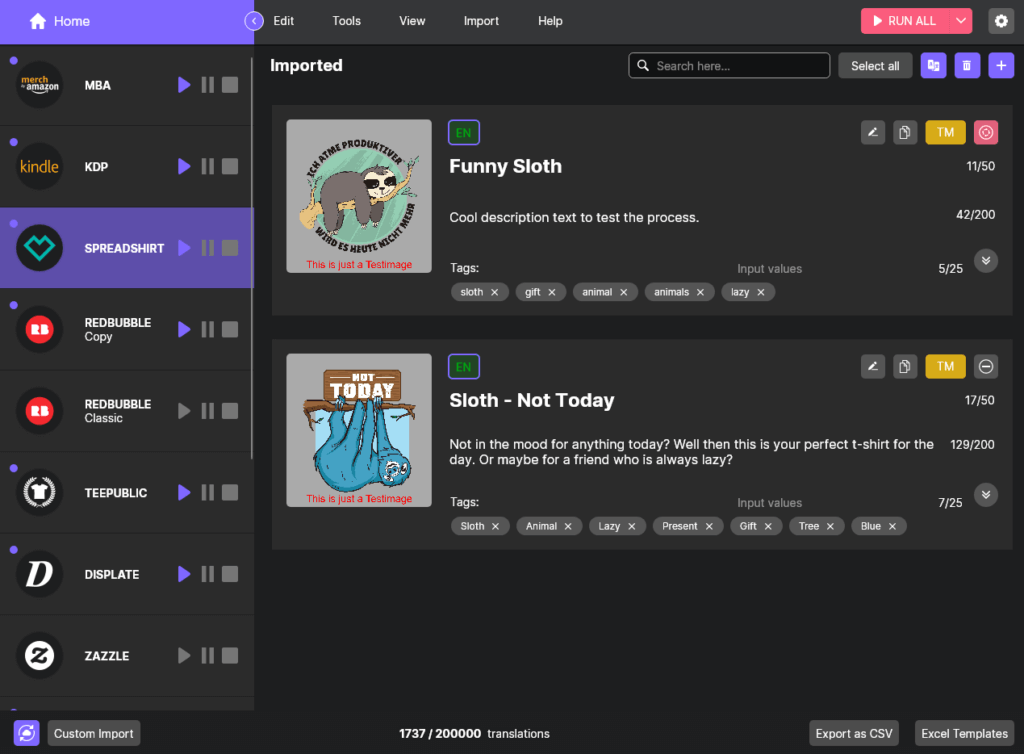
When the platform navbar is collapsed, you can still right-click on the platform to give the commands to start, pause, stop, and reset the cache.
Next to the logos you can see indicators of the status of the platforms. These show whether designs are loaded on the platform, whether they have all been uploaded, errors occurred or there is a warning.
Shortcuts
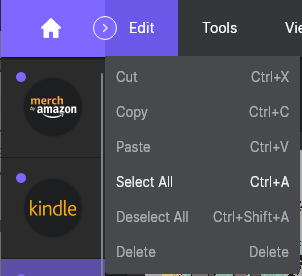
With this update we bring various edit functions that can be applied via shortcut. You can apply them to the design entries and different rows. For example, clearing the workspace is now as simple as CTRL+A and Del.
More Compact Workspace Tools
We have tried to make the tools of the workplace more compact. Some buttons have simply been replaced with icons and there are new icons for the Image Preview and the Product Settings Table.

Import
We have made the import even more flexible. By clicking on the + icon of a platform you can start the import for this platform.

It is possible to drag & drop multiple Excel files or select them by the file explorer. If they are loaded into the import area, you can select your desired sheets of the files.

Custom Excel Import
The Custom Excel Import will be explained in a separate section, as some things have changed here as well.
However, the import of custom files can now also be performed by the button at the bottom left of the tool. As described above, adding multiple files is also possible here.
Introducing Template Settings
Templates are a great thing when it comes to choosing settings once and having the flexibility to assign the desired template to each design. This is especially helpful for situations where you need this flexibility for designs with different product colors, e.g. light and dark designs.
These template settings will be available for MBA, Teepublic and the Custom Excel Import.
MBA
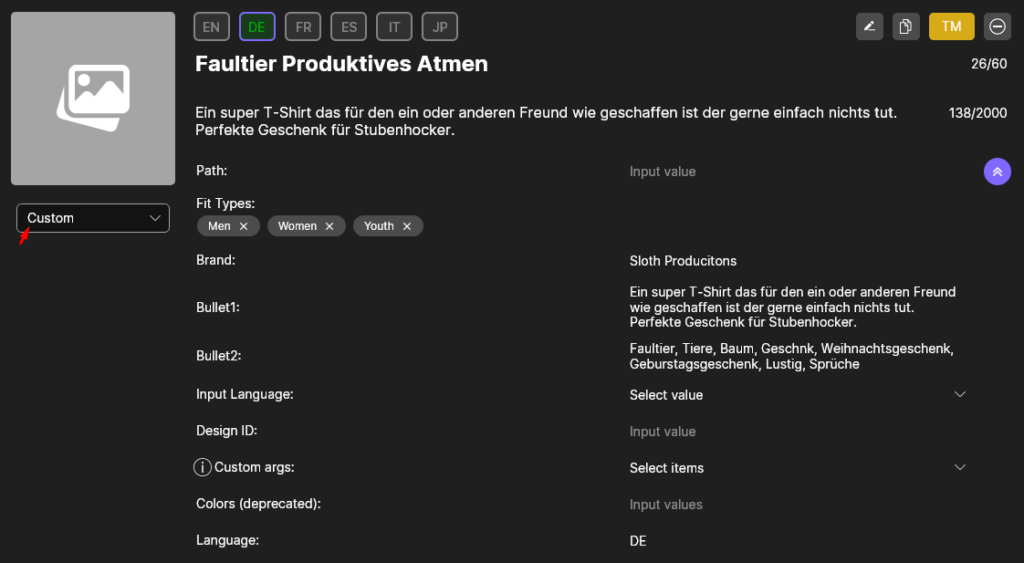
In the Template Settings of MBA you can now activate products on different marketplaces, set colors and prices.
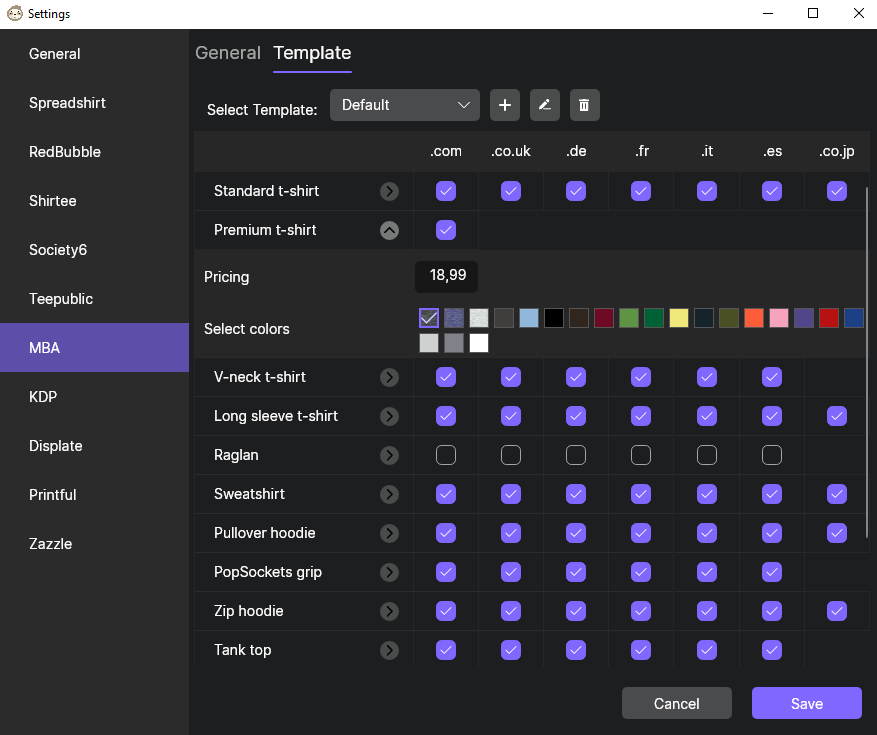
In our new Excel files you can enter the names of your template settings. In the workspace of the upload tool you can still change the template by selecting the proper one from your dropdown list.
Teepublic
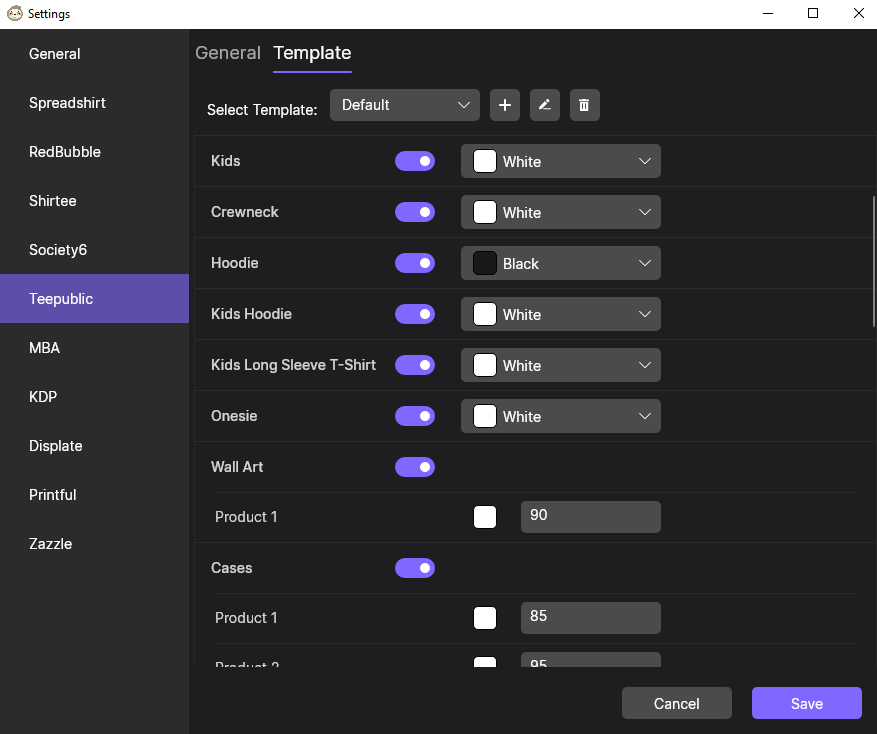
In the template settings of Teepublic you can now define which products should be activated and which colors they should have. For all products where you can scale the design on Teepublic, you can also select the value here in the settings.
Custom Excel Import
With the Custom Excel Import it works quite similarly. There, we have changed the entire settings area and made it possible to create template settings. This means that you can preset several inputs and are still flexible. Especially users who filled the fields with cloze texts were limited because of the language they used. Now you can create a separate template for each language or use case.

In the image above you can see how templates were created in the Custom Import Settings and how settings were made within these templates.
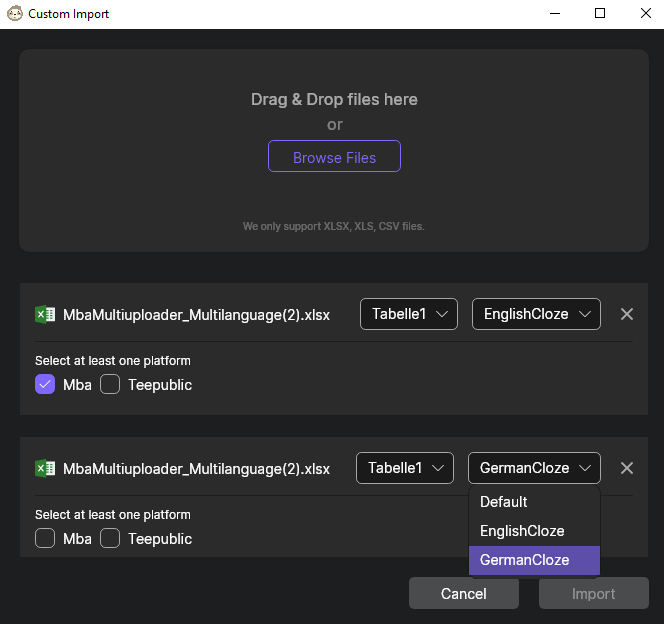
In the image below you can see the import. During the import, the sheet of the Excel file is selected and it is decided which Custom Import Settings template should be used. Furthermore you can choose from the platforms that were activated in the template. So you don’t have to import for all platforms if you want to import a custom table.
Old Settings & Old Excel Files
Old settings & old Excel files can still be used. Existing settings from MBA, Teepublic and the Custom Excel Import will now be taken into your future Default Template.
Please make the effort and change the default templates or create new template settings to make your desired selection. Since the colors often came from the Excel files so far, default colors will be chosen for your default templates.
For MBA and Teepublic you can still use the old Excel files of the last version. For MBA there was the Multilanguage Excel File and the Single Language Excel File, which is still from our first version. In the future, only the Multilanguage Excel File and the Multilanguage Template Settings File will be accepted for import. For everything else you have to make a custom Excel import.
Please always try to use the latest Excel files and settings. In the current version you may still find settings that have (deprecated) as an epithet. You can still use them temporarily, but these obsolete settings will be removed from the tool over time.
Product Settings Window
New ways create new needs. By facilitating with the template settings, we also had to create the possibility that one can make quick changes to it. For this reason there is the Product Settings Window. This can be called from the workspace and you can assign a different template to your designs or quickly add a product, change prices or make a different color choice.

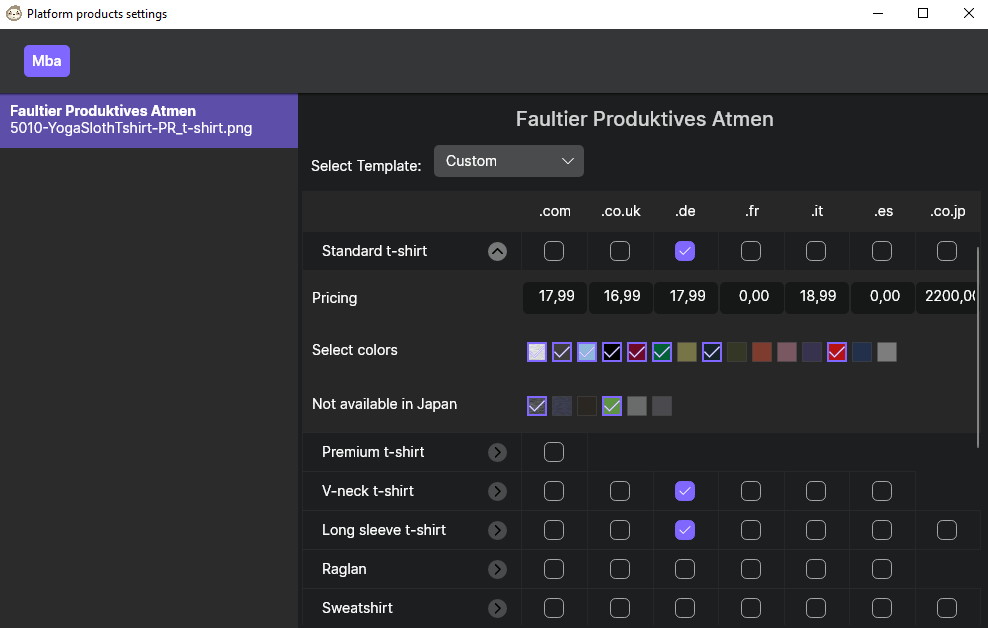
You can use the dropdown menu to give your design a new template setting. Or you can simply click on the settings you want to change and make a customized template out of it. These Custom Templates are temporary and show you that you have made custom settings for a design.
Other Noteworthy Changes
MBA Presets
Some of you use MBA’s templates and presets that you can create on their site. Of course you can still use this functionality, but you have to give the tool the customArg “Template”. To do this, fill the corresponding column in the Excel file or enter it in the tool.
Differentiation Of Phonecase Files
You asked for it, we deliver. Some users design their phone cases for each device themselves and want to specify them accordingly in the design paths to upload them. Until now, this was not possible because the iPhone and Samsung case had exactly the same resolution. So the tool could not decide which file is for the iPhone and which is for the Samsung device. We have implemented a logic that takes into account many special cases and decides when to use which file. The simplest case is when you have iPhone or Samsung somewhere in the name of the file. The whole thing is case insensitive and does not follow any naming convention. It can also look like this: lazyiphoneapplebanana.png and coolupdatelazysamsungmerch.png
Or whatever you want to name it.
Spreadshirt Template Issues Fixed
Due to a problem with the template selection, where Spreadshirt did not load the products of the selected template fast enough, it sometimes happened that designs were published with the default products.
To eliminate this source of error, we have now made the selection process more elaborate and can determine whether the desired products were really added, otherwise the template is selected again or the design is not even completely uploaded.
Search Function In The Product Settings
Looking for a specific product on Zazzle, Printful or Society6 and scrolling back and forth forever? Not anymore. We’ve added a Product Settings search bar to Zazzle, Printful, Society6, Redbubble, and Shirtee.
Run Sequenced
We have added the “Run Sequenced” feature so that you start uploading sequentially for the platforms. For this purpose, there is a setting in the settings that asks how many platforms can be uploaded at the same time. If you select the value “2”, for example, you will never upload to more than two platforms at the same time.
So you can start the upload and the tool works through all platforms one after the other, but never more than the number you selected at the same time.


